

Last Updated: 20 April, 2023
In order to set up a Java Local Development Environment for the Windows 10 Operating System, you need to follow the below-mentioned steps one by one.
In this tutorial, you will go over how to download the Java 11 installation file, the installation process, setting up the Java class path, and verifying the installation after it has been successfully installed on your local system.
Step 1: Download Java 11
First of all, you have to download the Java 11 installation file from the given URL and store the downloaded file on your local system. Before downloading, make sure your system type is 32-bit or 64-bit OS, and download accordingly.
Step 2: Installation Process
Once the download is complete, you will next start the installation process.
You will get the below file (.exe) on your local system.

Double click on the downloaded file. The Installation Wizard window will appear on the screen as given below.
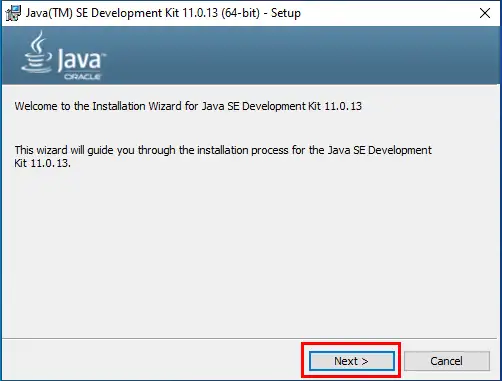
Just click on the Next button and proceed ahead.

Just click on the Next button and proceed ahead.
Please note that in the Windows OS, Java is by default installed in the c:\Program Files\Java folder, but we can change that as well.
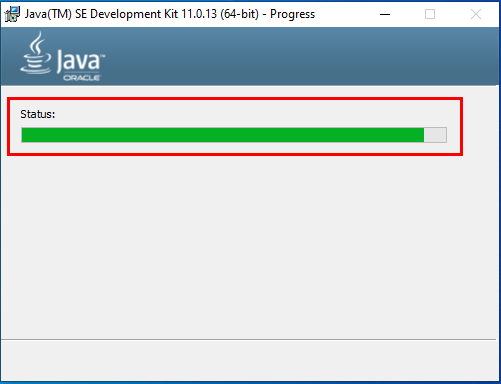
Wait until the installation process is completed.

Installed successfully, just click on the Close button.
Step 3: Setting Up the Java Class Path
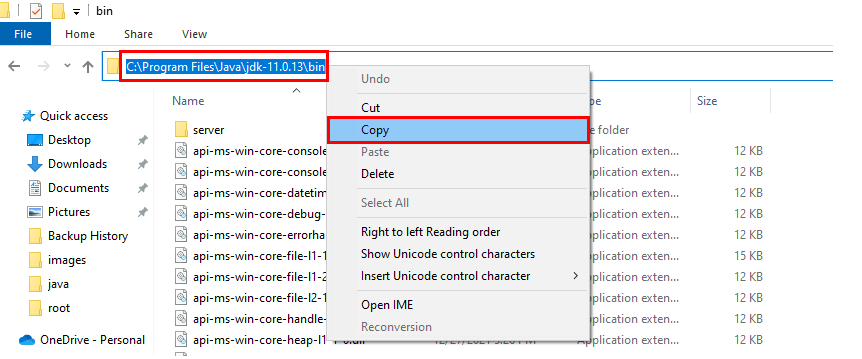
Once installation is complete, go to the Java installation location as given below.

Copy the full path to the bin directory for setting the Java classpath.
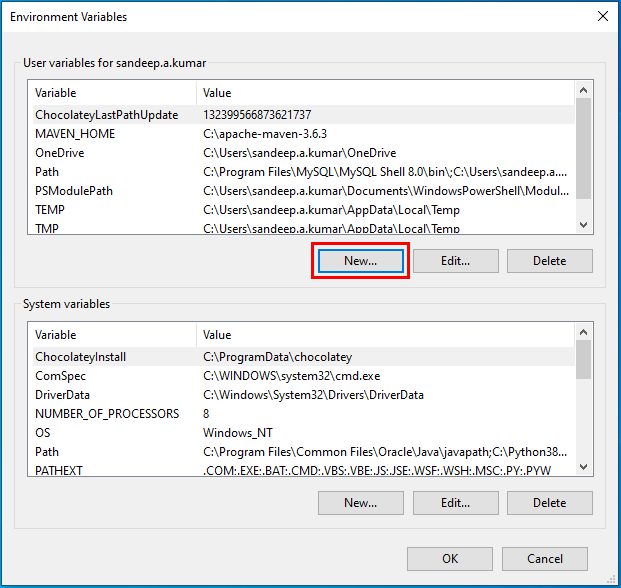
Open the Environment Variable window
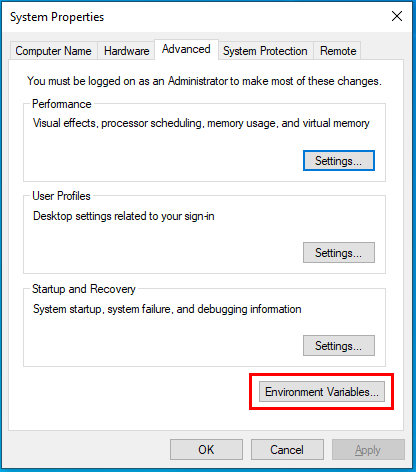
In System variables (as marked in red below), click the New button to add a new JAVA_HOME variable and point it to the JDK installed folder.
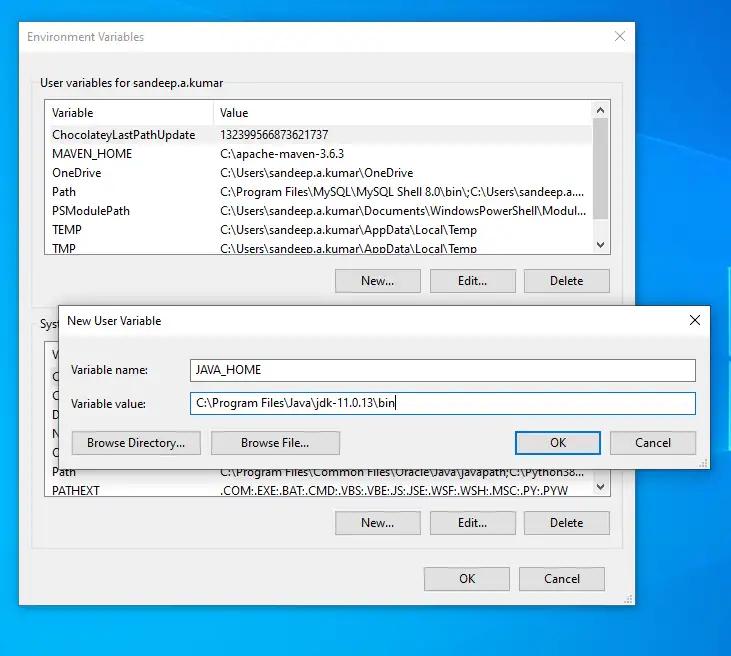
Fill in the variable name and variable value (as given below) and click on the OK button.
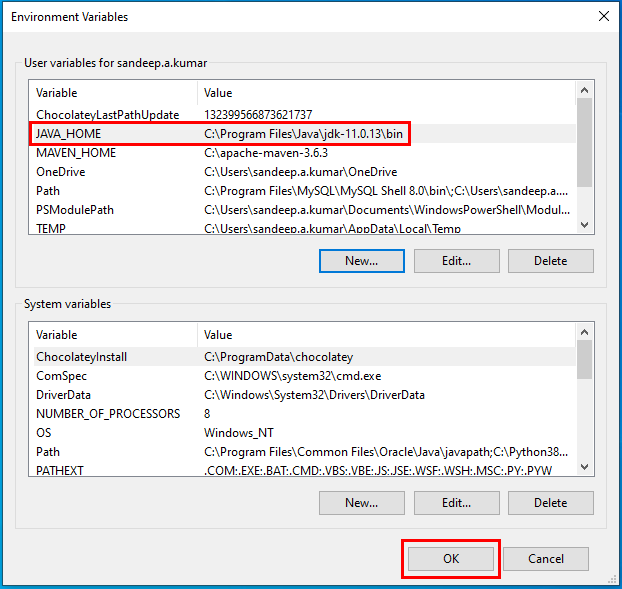
Once done with the JAVA_HOME setup, next click on the OK button and close the window.
Step 4: Verify After Successful Installation
Once completing the JAVA_HOME set up, it is also very important to verify whether the Java installation and JAVA_HOME setup were done properly or not.
Open the console and run the java -version command as given below.
This command will print the installed Java version and Java Runtime Environment information as well.

Next, run the Java compiler using the javac command as given below.
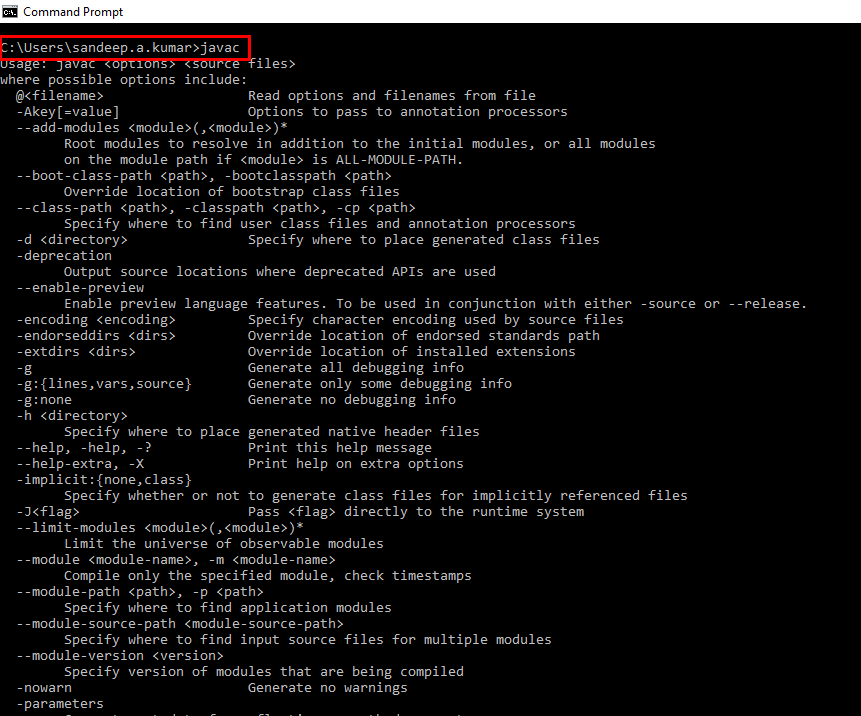
Once you verify and confirm your Java installation and JAVA_HOME setup successfully, then you can start your Java coding on your local machine.
That's all guys, hope this Java installation process is helpful for you.
Happy Learning... 😀
feedback@javabytechie.com